A documented, 14-step biohazard SOP is the single biggest lever for margin, liability protection, and crew retention in this industry. Operators running a written SOP close roughly 20–30% faster on scene, reduce insurance-billing write-offs by $400–$1,200 per job, and pass OSHA audits without scrambling. If your field process lives in one tech’s head, you don’t have a business — you have a liability.
Every biohazard cleanup company says they have a “process.” Ask to see it on paper and most owners go quiet. The ones who can hand you a binder — or better, pull up a tablet workflow — are the ones billing $3,500–$8,000 per job with consistent margins, clean insurance approvals, and crews that don’t burn out after eighteen months.
This is that binder. Fourteen steps, in the order they happen on every job, with the specific products, times, and decisions that separate a professional operation from a guy with a Shop-Vac and a Tyvek suit. Use it as a training document, an audit checklist, or the starting point for building your own. But do not run another unattended death scene without one.
Step 1: Initial Call Intake
The first sixty seconds of a call dictates whether you book the job, price it correctly, and arrive prepared. This is not a sales call — it’s a triage call. The caller is usually a family member, a property manager, or a law enforcement referral, and they are almost always in emotional distress or operational crisis.
Your intake script should capture, in this order: caller relationship to the property, address with access details, type of incident (unattended death, suicide, trauma, hoarding, infectious disease), approximate time elapsed since incident, square footage affected, surfaces involved (porous vs. non-porous), and insurance or payment source. Train intake staff to ask these questions conversationally, not as a checklist.
Pricing disclosure at intake is non-negotiable. State a transparent range — “most unattended death jobs run $2,500 to $7,500 depending on scope, and your homeowners insurance typically covers it with a deductible” — and capture the policy information before dispatch. Companies that hide pricing until after arrival generate chargebacks, BBB complaints, and online reviews that tank local SEO rankings for years.
Scope capture needs photos before you roll a truck whenever possible. A caller texting three pictures of the scene lets your dispatcher select the right PPE level, the right containment footprint, and the right crew size. If the caller can’t send photos, build in a 15-minute on-site assessment window before committing to a full-scope price.
“We lost $40,000 in one year underbidding jobs from phone-only scope. Adding mandatory photo-intake dropped write-offs to under 3% and let us pre-stage trucks correctly.” — Ops manager, Midwest biohazard firm
Intake Red Flags
- Refusal to provide address — often indicates unauthorized cleanup (tenant without landlord consent)
- Cash-only, no insurance, no billing — not automatic disqualification but requires deposit
- Active crime scene still taped off — schedule for after release, never before
- Caller is intoxicated or incoherent — call back in 30 minutes, get a sober decision-maker on record
Step 2: Dispatch and ETA Confirmation
Response time is the #1 ranking factor both for customer satisfaction and for referral-partner retention. Set internal SLAs: 2 hours for active trauma scenes, same-day for unattended deaths under 48 hours old, next-business-day for decomposition over 72 hours where the scene is already contained.
Dispatch selects crew size and truck based on intake data. A two-person crew handles roughly 70% of residential jobs under 1,500 sq ft. A three-person crew is mandatory for any scene with >72-hour decomp, hoarding components, or multi-room contamination. Never send a solo technician — OSHA 1910.1030 bloodborne pathogen standards require buddy verification of PPE donning and doffing.
Your dispatch confirmation should go to the client via text message with: crew lead name, ETA window (not a single time), truck number or ID, and a payment-method reminder. This cuts no-shows, cancellations, and the “I thought you were coming at 2” complaints that eat into crew productivity.
If you’re running multiple crews, a dispatch board — even a basic Google Sheet — needs columns for: job ID, address, incident type, crew assigned, departure time, arrival time, estimated completion, disposal hauler scheduled. Companies scaling past three trucks should look at purpose-built dispatch software rather than duct-taping CRMs together.
Step 3: Pre-Job Scene Assessment
Arrival does not mean starting work. The first 15–30 minutes on scene is assessment — full stop. The crew lead walks the affected area in minimum PPE (N95, nitrile gloves, shoe covers) and documents: contamination footprint, porous materials affected, structural concerns, pest presence, HVAC involvement, and any hazards beyond the biological (needles, firearms, prescription medications).
Risk-level classification drives every subsequent decision. Most residential biohazard work falls into three tiers:
- Tier 1 (Standard bloodborne): Contained blood, recent incident, non-porous surfaces. Level D PPE, standard disinfectants, 2–4 hour job.
- Tier 2 (Decomposition or high-volume): Unattended death, extensive fluids, odor present. Level C PPE, full containment, 6–12 hour job, possible demolition of porous materials.
- Tier 3 (Infectious disease, C. diff, hantavirus, or large-scale trauma): Level C PPE minimum with PAPR consideration, negative-air containment mandatory, specialized disinfectants, 12–24+ hour jobs.
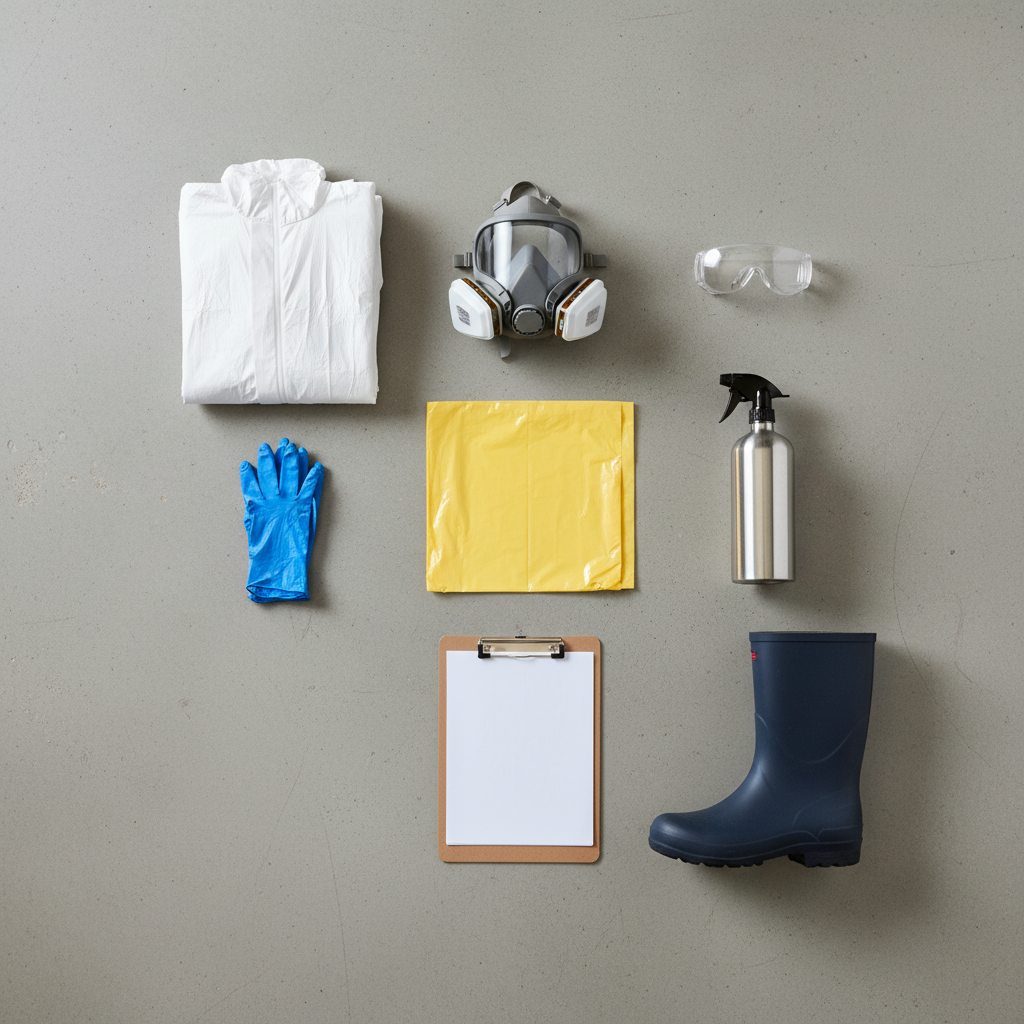
Equipment list gets built from the classification. Standard tier-2 equipment includes: 6-mil plastic sheeting, painter’s tape and duct tape, HEPA air scrubber (AirPura or BlueDri F-901), shop vac with HEPA filter, Tyvek 400 suits (size up for layering), P100 half-face respirators minimum, sharps containers (rigid red, 5-gallon), red biohazard bags (33-gallon, 3-mil), absorbent (ZorbXtra or granular clay), EPA-registered disinfectants, ATP luminometer, thermal fogger or ozone generator (job-dependent), and a complete photo/documentation kit.
Step 4: Client Arrival and Rapport
You are walking into what is likely the worst day of someone’s life. The client at the door is often a parent, spouse, or child of the deceased. How your crew handles the first ten minutes determines not just this job but every referral that client generates for the next decade.
Train your crew leads in trauma-informed communication. The three rules: introduce yourself by name, never use the deceased’s name unless the client uses it first, and never say “I understand” — you don’t. Better phrases: “I’m so sorry for your loss,” “We’ll take care of this,” “You don’t need to go back in there again.”
Offer the client a clear out. “Is there somewhere you’d like to be while we work? A neighbor’s, a coffee shop? I’ll call you when we’re ready for the walk-through.” Clients who stay on scene during active decontamination will hear, smell, and see things that become traumatic memories. Your job is to protect them from that.
If the client insists on staying, designate a cold-zone waiting area away from sightlines and HVAC flow. Assign one crew member as liaison — usually the crew lead — so the client has exactly one point of contact and isn’t fielding conflicting updates from three technicians.
“Empathy is a billable skill. The technician who sits with a grieving widow for twenty minutes before starting the job generates three times the lifetime referral value of the one who just starts working.”
Step 5: Authorization and Paperwork
Nothing crosses the threshold of contamination until paperwork is signed. This is the step most ops managers hate enforcing and most insurance adjusters later wish had been enforced better.
Minimum signed documents before work begins:
- Work authorization — scope, estimated range, hourly rate if scope expands, client signature
- Insurance assignment of benefits (AOB) — if direct-billing a homeowners carrier
- Photo and video consent — for insurance documentation and before/after files
- Demolition consent — separate authorization for any flooring, drywall, subfloor, or cabinetry removal
- Personal property disposition — what items get salvaged, what gets disposed, who makes the call
Insurance direct-billing is where most operators leak money. If you’re not already an approved vendor with major carriers (State Farm, Allstate, USAA, Farmers, Liberty Mutual), start that process now. Direct-bill jobs close 40–60% faster than claimant-reimbursement jobs and reduce collections work to nearly zero.
Photo consent matters for more than documentation. Every insurance claim requires before, during, and after photos. Every training deck, every marketing case study (with client anonymization), and every dispute defense relies on photo evidence. Consent captured upfront prevents the panicked “can I use these photos?” call three months later.
Step 6: PPE Donning Protocol
PPE donning is not a time to rush. A Level C donning sequence takes 18–22 minutes for a trained technician working with a buddy. Anyone who tells you they don their full PPE in under ten minutes is either lying or doing it wrong.
Standard Level C donning sequence:
- Remove all personal jewelry, watches, phones from pockets
- Inner nitrile gloves (first layer)
- Tyvek 400 suit, legs first, then arms, zip to mid-chest
- Shoe covers or rubber boots, taped to suit legs with duct tape
- P100 respirator or PAPR — fit-check mandatory, documented quarterly
- Hood up, zip suit to chin, tape collar to respirator
- Outer nitrile gloves, taped to suit sleeves
- Safety glasses or face shield if not using full-face respirator
- Buddy check — partner verifies every seam, tape, and fit point
Buddy verification is required by OSHA 1910.132 and is non-optional. Document the buddy check with a photo or signed form for every crew member, every job. This single practice eliminates 90% of PPE-related exposure incidents and provides documentation defense in the event of a worker’s comp claim.
Doffing is more dangerous than donning. Contaminated PPE is removed in a designated warm zone, in reverse order, with each layer placed into a red biohazard bag. Hands get sanitized between every layer. The final glove comes off inside-out. This is where cross-contamination happens — train it, drill it, audit it.
Step 7: Containment Setup
Containment is what separates a professional biohazard job from a maid service with bleach. Three zones, plastic sheeting, and controlled airflow. No exceptions.
The three-zone system:
- Hot zone — the contaminated area itself. Plastic-sheeted floor-to-ceiling on every boundary. Only fully-PPE’d crew enters.
- Warm zone — the transition area for PPE doffing and equipment decon. Adjacent to hot zone, also sheeted, with staged red bags and sharps containers.
- Cold zone — clean area for rest breaks, hydration, and paperwork. Outside the contained space entirely.
Negative air pressure is generated with a HEPA air scrubber (AirPura T600 DLX or BlueDri F-901 are industry standards) exhausting through ducted poly to an exterior window or door. Target 4–6 air changes per hour in the hot zone. Negative pressure prevents contaminated air, odor, and aerosolized pathogens from migrating into uncontaminated areas of the structure.
Plastic sheeting is 6-mil, double-layered on floors, single-layered on walls up to ceiling height or the contamination boundary, whichever is higher. Tape every seam with 2-inch duct tape. Painter’s tape adheres the plastic to painted surfaces without damage. Allow 45–90 minutes for containment setup on a typical residential scene.
Step 8: Bulk Biohazard Removal
Bulk removal is the physically hardest part of the job. Contaminated materials — mattresses, carpet, pad, subfloor, upholstered furniture, drywall — come out first because they can’t be effectively decontaminated and must be disposed of as regulated medical waste.
Sharps get isolated immediately. Anything that could penetrate skin — needles, broken glass, razors, bone fragments — goes into a rigid sharps container (5-gallon, OSHA-compliant, sealed when 3/4 full). Never into a bag, ever. Puncture through a red bag is a needlestick incident that triggers post-exposure protocols, bloodwork, and documentation that will consume 8–20 hours of an ops manager’s time.
Tissue, fluids, and absorbed materials go into 3-mil red biohazard bags, double-bagged, sealed with zip ties (not tape — zip ties survive transport vibration). Maximum bag weight is 50 lbs for liability and manifest compliance.
Bulk porous materials — mattress, carpet, pad — get cut into manageable sections inside the hot zone (never dragged through clean areas), rolled with contamination inward, secured with plastic and tape, and staged in the warm zone for transport. Every cut reduces contaminated-material volume by 60–80%, which directly reduces disposal cost.
Document every bulk item removed with a photo and log entry. Insurance adjusters reject claims where line-item disposal doesn’t match photographed removal. “One king mattress, one box spring, 45 sq ft carpet and pad, 12 sq ft subfloor” is a defendable invoice line. “Bulk materials removed” is a denied claim waiting to happen.
Step 9: Decontamination Cleaning
Once bulk is out, decon begins. This is multi-pass, hospital-grade disinfection with EPA-registered products against bloodborne pathogens, with documented dwell times. “Spray and wipe” is not decontamination — it’s what civilians do with Windex.
Product selection by application:
- Benefect Decon 30 — botanical-based, 30-second kill claim against HIV, HBV, HCV, MRSA, norovirus. Good for occupied spaces where residual chemical smell is unacceptable. Dwell time 30 seconds to 10 minutes depending on pathogen.
- SaniZide Pro 1 — quaternary ammonium, ready-to-use, 3-minute dwell for bloodborne pathogens. Workhorse product for hard surfaces.
- Vital Oxide — chlorine dioxide, 10-minute dwell, odor neutralizing, safe on most fabrics. Useful for spaces where bleach is too aggressive.
- Clorox Healthcare Bleach Germicidal — 1:10 diluted bleach, 1-minute dwell for most pathogens, 5-minute for C. diff spores. Gold standard for contamination requiring sporicidal action.
Multi-pass cleaning means three distinct passes with documentation between each: mechanical cleaning (remove visible contamination with detergent), first disinfection pass (full dwell time), ATP test, second disinfection pass if ATP fails, final ATP test. Skipping the mechanical-cleaning step is the most common error — disinfectants don’t penetrate organic soil effectively.
Porous surfaces that can’t be removed (wood floors, studs, subfloor seams) get treated with an antimicrobial sealant after decon — Fiberlock IAQ 6100 or ShockWave are common choices. Document application area, product, and lot number for the job file.
Step 10: ATP Testing and Verification
ATP (adenosine triphosphate) testing is how you prove decontamination worked. Without it, you’re asking the client to take your word. With it, you’re handing them a numeric report with before/after readings.
An ATP luminometer — Hygiena SystemSURE Plus or 3M Clean-Trace are industry standards — measures biological residue in Relative Light Units (RLU). Healthcare clean-surface benchmarks are typically <30 RLU. Post-decon biohazard surfaces should target <10 RLU on hard non-porous surfaces.
Testing protocol:
- Pre-cleaning baseline swab of a representative contaminated surface (document RLU reading and location)
- Complete mechanical cleaning and first disinfection pass
- Post-first-pass swab at same location (new swab, document RLU)
- If RLU >10, second disinfection pass with documented dwell
- Final verification swab, document RLU
- Swab at least 3–5 locations across the contaminated footprint
ATP test strips run roughly $3–$5 each at volume. Budget 6–10 strips per Tier 2 job, 10–15 per Tier 3 job. The documentation they generate pays for itself the first time an insurance adjuster, attorney, or public health inspector asks how you verified decontamination.
Bacterial culture testing is a separate service — send swabs to an accredited lab (EMSL, ProLab) when the client or insurer requests independent verification. Budget 48–72 hours for results and $75–$150 per sample.
Step 11: Odor Elimination
Odor is the last thing the client will notice and the first thing they’ll complain about. Decomposition odor specifically penetrates porous materials at the molecular level and requires active remediation, not masking.
The three main odor elimination technologies and when to use each:
- Hydroxyl generators (Odorox MDU, BioSweep) — safe to run in occupied spaces, 24–72 hour run time, no chemical residue. First choice for residential jobs where the family will return to the home.
- Ozone generators (Rainbowair, BioShock) — faster results in 4–12 hours but requires total evacuation of people, plants, and pets. Bleaches some fabrics and rubber. Use only in vacant structures.
- Thermal fogging (with deodorizing counteractants like Sporicidin or Unsmoke TOC) — penetrates HVAC, wall voids, and porous substrates that other methods miss. Used in combination with hydroxyl or ozone, not as standalone.
The common mistake: running one odor-elimination method and calling it done. Decomposition odor in a home with drywall, carpet pad, subfloor, and an active HVAC system requires a combination approach — bulk removal of affected porous materials, thermal fogging of concealed spaces, and 48–72 hours of hydroxyl or ozone treatment. Shortcut any of these and the client calls you back in two weeks.
HVAC decontamination is where most odor jobs fail. If the system ran during or after the incident, the evaporator coil, ductwork, and return plenum are contaminated. Sub-contract an HVAC specialist if you don’t do this in-house — the odor will keep returning until the duct system is cleaned and sealed.
Step 12: Waste Manifest and Disposal
Regulated medical waste (RMW) disposal is governed by both federal DOT regulations and state-specific medical waste rules that vary significantly. California, New York, Florida, Texas, and Illinois have the strictest requirements; most other states follow DOT 49 CFR 173.197 for packaging and shipping.
Your disposal workflow:
- Contract with a licensed medical waste hauler (Stericycle, Daniels Health, MedPro) — get a certificate of insurance and current state license
- Use manifest-compliant packaging: red biohazard bags inside approved rigid containers (DOT-approved corrugated boxes or reusable totes)
- Complete manifest at pickup — generator name (your company), waste type, weight, date, transporter signature
- Receive return copy of manifest from the hauler with disposal confirmation (typically 30–45 days later)
- Retain manifests for minimum 3 years — some states require 5 or 7
Manifest tracking is where small operators get fined. Your generator number, hauler signatures, and disposal receipts need to match. Audit your manifest file quarterly — missing return manifests mean waste you can’t prove was legally disposed of, which is a chain-of-custody failure if audited.
Cost varies significantly by region — expect $0.75–$2.50 per pound of RMW disposal, with minimums of $150–$400 per pickup. High-volume operators negotiate flat-rate contracts for predictable cost.
Sharps disposal is separate from bulk RMW in most jurisdictions and carries its own manifest. Never commingle.
Step 13: Final Walk-Through with Client
The walk-through is your closing. This is where a satisfied client becomes a five-star review, a repeat referral source, and a case study. It’s also where a dissatisfied client becomes a chargeback, a complaint, and a one-star review.
What to show during the walk-through:
- The full cleaned area, with lights on, from multiple angles
- Before/after photos on a tablet — same angle, same composition
- ATP test results (printed or on-screen), with explanation of the numbers
- Antimicrobial treatment documentation — product, area, date, technician
- Disposal manifest with scheduled pickup confirmation
- Any structural recommendations the client’s contractor should address (flooring, drywall, paint)
What NOT to show: graphic close-ups of the incident site, unedited phone photos, or anything that could re-traumatize the client. Before photos exist for insurance documentation, not for the walk-through. If the client asks to see them, have a printed evidence packet prepared with only what they’ve requested.
Client sign-off is a signed completion form that certifies: scope completed per work authorization, client satisfied with workmanship, any remaining items noted. This document is your defense against post-job complaints, scope disputes, and insurance pushback. No sign-off, no invoice submitted — train your crews on this without exception.
Leave the client with a one-page printed summary: what was done, what products were used (in case of allergies or follow-up questions), who to call with concerns, and a request for an online review with the direct link. The 24–48 hours after a biohazard job is peak gratitude window — that’s when reviews happen.
Step 14: Post-Job Review and Invoicing
Back at the shop, the job isn’t done until three things happen: crew debrief, photo documentation uploaded and organized, and invoice generated and submitted.
Crew debrief is a 10-minute sit-down with the crew lead and any technicians. Run through: what went well, what went wrong, any near-misses or exposure incidents, equipment damaged or consumed, scope changes from original estimate. This is how your SOP improves — capture the lessons while they’re fresh, not at the annual training.
Photo documentation needs a standardized file structure. Every job folder gets: intake photos, pre-job scene, bulk removal (before/during/after), ATP test results, antimicrobial application, final walk-through photos, completion form scan, manifest scans. Cloud storage with consistent naming (2026-04-14_Smith_unattended-death_before-001.jpg) makes files retrievable three years from now when an attorney subpoenas them.
Invoicing should go out within 24 hours for cash/private-pay jobs, within 48 hours for insurance direct-bill. Every line item ties to a photo, a material removed, or a documented service hour. Insurance adjusters approve invoices faster when the supporting documentation matches the line items exactly — disorganized billing is the #1 reason for delays, write-downs, and rejected claims.
For insurance billing, use Xactimate or Symbility line-item codes wherever possible. “BIO LABOR” at $85/hr is a defendable line. “Cleanup services” at $4,200 flat is an adjuster’s invitation to negotiate you down by 30%.
Putting the SOP into Practice
A written SOP is worthless if it lives in a Google Drive nobody opens. Get it onto tablets in every truck. Build it into your field-service software as a checklist that must be completed per step. Print laminated crew-lead cards with the step-by-step for new hires.
Audit quarterly. Pull three random jobs from the last 90 days and walk the paper trail — intake form through manifest return. Any step missing documentation is a training gap. Any step consistently missing across multiple jobs is an SOP gap that needs revision.
Your SOP is also your best marketing asset. When a potential client or insurance adjuster asks what makes you different, “we’re careful and professional” is what everyone says. “Here’s our 14-step documented SOP with OSHA and EPA references” is what gets you the job and the next one.
The operators who build referral networks, lock in preferred-vendor status with insurance carriers, and rank locally for the high-intent keywords are all running documented systems behind the scenes. The SOP is the system. Everything else is downstream of it.
For owners still building out their ops foundation, explore more operational and growth playbooks on our Industry Hub, and if you’re ready to join the national directory and start capturing referral traffic from families and property managers searching right now, see our listings for biohazard cleanup companies.
Frequently Asked Questions
How long should a typical unattended death cleanup take from dispatch to final walk-through?
A standard Tier 2 unattended death job (single room, recent incident, no hoarding) runs 6–10 hours on scene for a two-person crew, plus 1–2 hours pre-dispatch and 1 hour post-job documentation. Tier 3 jobs with extensive decomposition, hoarding, or multi-room contamination frequently require 2–3 days with odor-elimination equipment running between visits.
What’s the minimum PPE standard for bloodborne pathogen work under OSHA 1910.1030?
OSHA 1910.1030 requires PPE sufficient to prevent blood or OPIM (other potentially infectious materials) from reaching the worker’s skin, clothing, or mucous membranes. In practice, that means at minimum: nitrile gloves, fluid-resistant gown or Tyvek suit, eye protection, and respiratory protection where aerosolization is possible. Most biohazard operators exceed the minimum with Level C PPE (full Tyvek, P100 respirator, double gloves) for any job involving bulk fluids or decomposition.
Do I need a separate license to haul regulated medical waste, or can I contract it out?
Hauling RMW typically requires a state-issued medical waste transporter license plus DOT HM-181 hazmat endorsement for the driver. Most biohazard cleanup operators contract with licensed haulers (Stericycle, Daniels, MedPro) rather than getting licensed to transport in-house — the administrative burden and insurance requirements usually outweigh the savings until you’re running 5+ trucks and generating consistent daily waste volume.
How do I price a job when I can’t see it before arrival?
Build a tiered pricing structure based on intake variables: incident type, time elapsed, approximate square footage, and surfaces affected. Quote a transparent range (“$2,500–$7,500 for unattended death, typical job falls in the middle”), not a fixed price. On-site, do a 15-minute assessment and present a firm scope with signed authorization before work begins. Never start work on a verbal agreement — scope creep is how operators lose money.
What ATP reading qualifies as “clean” for biohazard verification?
Healthcare surface benchmarks are typically <30 RLU (Relative Light Units). For post-biohazard decontamination on hard, non-porous surfaces, most operators target <10 RLU as the pass threshold. Porous or textured surfaces naturally read higher even when properly cleaned — adjust your pass threshold upward by 5–10 RLU for those surfaces and document the surface type with every reading.
Which disinfectant should I use for C. diff or norovirus contamination?
C. diff spores require a sporicidal product with a documented kill claim — 1:10 bleach (Clorox Healthcare Bleach Germicidal) with a 5-minute dwell is the most common choice. For norovirus, 1:50 bleach with 1-minute dwell or a quaternary-ammonium product with specific norovirus claim (check EPA List G) works. Most quaternary disinfectants alone are NOT effective against C. diff spores — verify EPA List K for sporicidal claims before substituting.
Should I handle insurance billing in-house or contract it out?
In-house billing is feasible for operators under $500K annual revenue if one person owns the billing function full or part-time. Past that volume, a dedicated billing specialist or third-party service (firms like ClaimSmart or Contractor Connection) typically pays for itself by reducing days-to-payment and catching underbilled line items. The break-even is roughly when your monthly insurance billings exceed $40–$50K and billing errors or delays are costing you more than a specialist’s salary.